
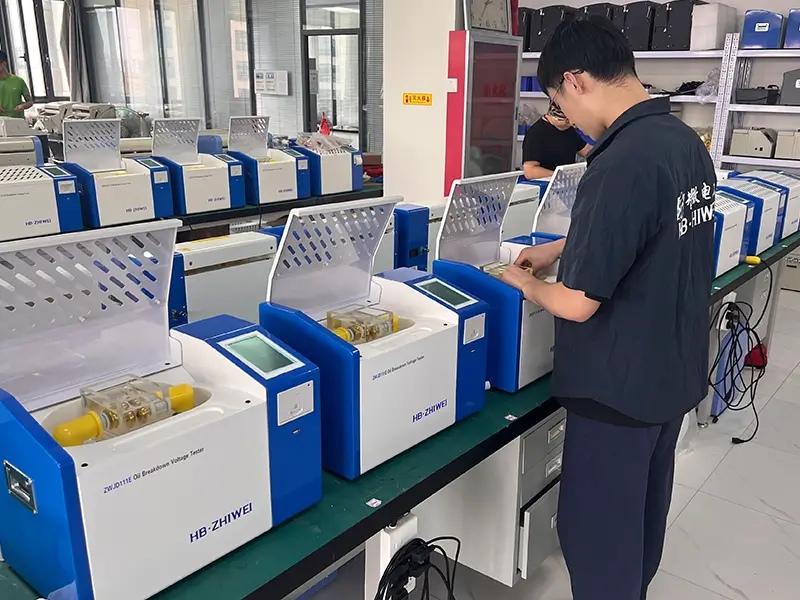
Measuring the dielectric strength of transformer oil is a critical step in equipment maintenance, factory testing, and laboratory research. The ZWJD series Insulating Oil Dielectric Strength Testers are designed to automate this process, providing accurate and efficient breakdown voltage (BDV) detection for both field and lab applications.
Below is a comprehensive guide to understanding, selecting, and using oil BDV testers.
What is an Insulating Oil BDV Tester?
An insulating oil BDV tester determines the dielectric strength of transformer oil. It works by injecting a prescribed volume of oil into a standard test cup and applying an increasing AC voltage across two standard electrodes. When the oil breaks down and forms a conductive path, the instrument instantly identifies the voltage at that moment—this is the Breakdown Voltage (BDV), measured in kV.
A higher BDV generally indicates better insulation capability. However, BDV is easily affected by moisture, solid impurities, and oil aging. Therefore, test results are most valuable when combined with other analyses using comprehensive power industry oil testing equipment like moisture content, acidity, and dielectric loss.
80kV vs. 100kV: How to Choose?
One of the most common questions from buyers is whether to choose an 80kV or 100kV model.
- 80kV Testers: Perfect for standard daily maintenance, routine factory tests, and conventional power transformers (220kV and below). It easily meets standard IEC 60156 requirements.
- 100kV Testers: Essential for Ultra-High Voltage (UHV) equipment (500kV and above), advanced laboratory research, testing limits of new high-quality oils, or when explicitly required by regional grid standards.
Single-Cup vs. Three-Cup Models?
- Single-Cup (e.g., ZWJD111 / ZWJD111B / ZWJD111E): Ideal for portable field use, spot checks, and standard factory testing.
- Three-Cup (e.g., ZWJD113E): Designed for high-volume lab testing, eliminating the need to repeatedly clean and dismantle cups between samples.
Supported Test Standards (IEC & ASTM)
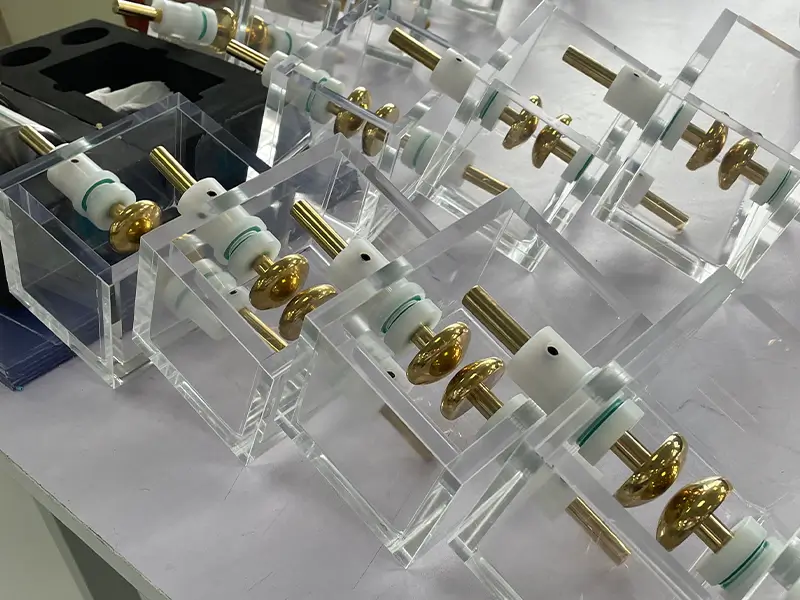
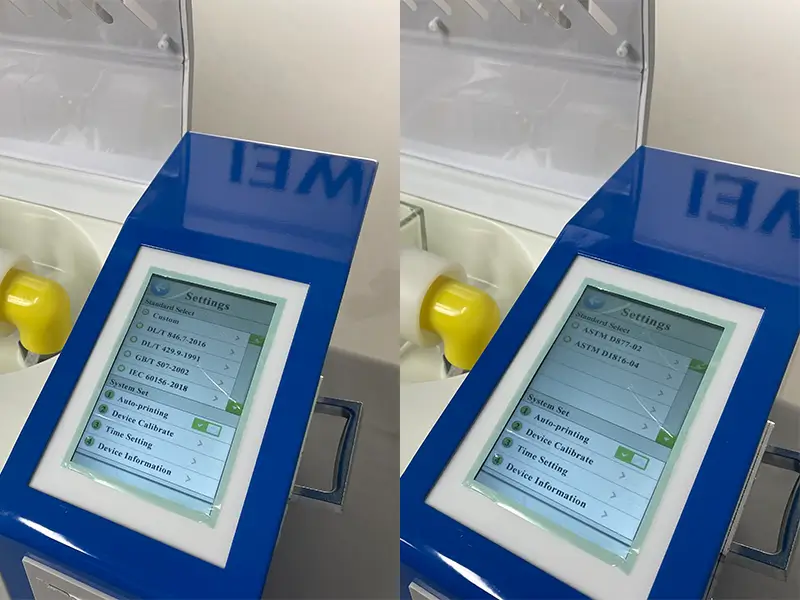
Testing must comply strictly with specific international standards as they dictate electrode shapes, gap distances, and voltage ramp rates. The ZWJD series supports:
- IEC 60156:2018
- ASTM D877-02
- ASTM D1816-04
Note: You cannot use the same test cup for all standards. Make sure your cup design and electrode gap configuration match your chosen project standard.
Core Features and Technical Specifications
To eliminate human error, the ZWJD series is fully automated. Key features include:
- Automation: Auto-boosting, auto-stirring, auto-breakdown detection, and calculation.
- Output Voltage: 0~80kV or 0~100kV depending on the chosen model.
- Accuracy: Superior voltage control with an accuracy of ±3%.
- Data Management: Built-in thermal printer, storage for 100 sets of data, and an RS232 port for PC communication.
- Compatible Liquids: Standard mineral insulating oil, ester insulating oils, silicone oils, etc.
Standard Operating Procedure (SOP) for Insulating Oil Breakdown Voltage Testing
The following procedure applies to general test preparation. During formal testing, you should always prioritize the specific project standards and the equipment’s operating manual.
Step 1: Equipment and Grounding Inspection
Pre-test checklist:
- Ensure the equipment casing is intact.
- Check that the high-voltage cover or safety mechanisms are functioning normally.
- Verify the power cord is in good condition.
- Ensure the grounding wire is reliably connected.
- Check that the test cup, electrodes, and stirring paddle are completely clean.
- Confirm that printer paper is loaded.
- Ensure no conductive objects are present around the equipment.
Step 2: Cleaning the Test Cup and Electrodes
The cleanliness of the test cup and electrodes directly impacts the test results.
Recommendations:
- Wash the test cup with a suitable clean solvent.
- Remove any oil film and carbon deposits from the electrode surfaces.
- Wipe with clean, lint-free materials.
- Avoid touching the electrode surfaces with bare fingers.
- Ensure the cup and electrodes are thoroughly dried after cleaning.
- Conduct necessary cleaning and drying processes between testing different oil samples.
If the test cup or electrodes are contaminated, it may cause:
- Unusually low breakdown voltages
- Fluctuating test results
- Repeated arcing
- Cross-contamination between samples
- Irreproducible test results
Step 3: Oil Sample Preparation
Precautions for sample preparation:
- The sampling container must be strictly clean and dry.
- Avoid drawing in air or moisture during the sampling process.
- Do not shake the oil sample vigorously.
- Avoid direct sunlight and prolonged exposure to air.
- The sample should have a clear identification number and source tracking.
- Record the sampling equipment, location, and time.
For transformer oil, the sample source should be specified as clearly as possible, such as:
- Main transformer body oil
- On-load tap changer (OLTC) oil
- Bushing oil
- Distribution transformer oil
- Oil from storage tanks or transport drums
- Unused new oil or in-service oil
Step 4: Injecting Oil into the Test Cup
Slowly pour the oil sample into the test cup to avoid forming large bubbles.
When filling, avoid:
- Pouring rapidly directly from a height.
- Allowing the oil stream to directly impact the electrodes.
- Letting external dust fall into the cup.
- Exceeding the specified liquid level limit of the test cup.
- Filling it too low (where the oil level is significantly below the effective electrode area).
- After filling, let the oil stand or stir it according to the specific test standard’s requirements.
Step 5: Setting Test Parameters
Input or select the following based on the project requirements:
- Sample ID number
- Test standard (e.g., IEC 60156, ASTM D877)
- Number of tests to perform
- Type of oil sample
- Test date
- Any other required information fields
Step 6: Starting the Automated Test
Once you initiate the test, the equipment will automatically proceed with:
- Voltage regulation
- Oil sample processing or stirring
- Step-by-step voltage boosting
- Breakdown detection
- High voltage cut-off
- Recording of the test parameters
- Warning: Operators must NOT open the test area or touch the test cup, electrodes, or test leads while the high-voltage test is in progress.
Step 7: Observing the Test Results
After the test is complete, specifically review:
- Each individual breakdown voltage
- The average breakdown voltage
- The standard deviation
- The number of valid tests conducted
- Sample ID and standard used
- Check for any obvious abnormal values (outliers).
If a single result is exceptionally low or high, double-check whether:
- There were air bubbles trapped in the oil.
- The electrodes were contaminated.
- The test cup wasn’t completely dry.
- The sample was over-stirred.
- Impurities found their way into the oil.
- The initial test parameters were set incorrectly.
Step 8: Printing and Saving Data
Upon test completion, output the results via the thermal printer and store the data in the device’s internal memory.
It is recommended to retain the following records on-site:
- Printed physical test tickets
- Saved electronic data
- Sample ID and name of the testing personnel
- Equipment model and serial number
- The applied test standard
- On-site environmental conditions (temperature and humidity)
- Notes regarding any abnormal circumstances during the test.
Interpreting Results and FAQs
Q1: Why shouldn’t I just look at a single BDV value?
A single breakdown value can be misleading due to minor impurities or bubbles. Standards require multiple tests on the same sample to calculate a reliable statistical average.
Q2: Why do my test results fluctuate wildly?
High dispersion in results usually means one of the following:
- The test cup wasn’t cleaned/dried properly.
- Carbon deposits were left on the electrodes from a previous test.
- Air bubbles or uneven moisture are present in the sample.
- The electrode gap was not calibrated accurately.
Q3: Can I test the exact same oil right after a breakdown?
No. An electrical breakdown creates carbon particles and arcs inside the oil. You must follow the standard’s specified rest time and stirring cycle to disperse the carbon before applying voltage again.
Conclusion
Accurate dielectric breakdown testing is the first line of defense against catastrophic transformer insulation failures. Achieving repeatable and legally compliant BDV measurements requires strict adherence to international testing procedures—particularly concerning proper test cup cleaning, accurate electrode gap calibration, and the elimination of trapped micro-bubbles.
By standardizing your on-site testing protocols in accordance with IEC 60156 or ASTM D877/D1816, utility crews and laboratory personnel can accurately track oil degradation, schedule timely filtration, and safeguard critical substation assets.
Find the Perfect BDV Tester for Your Next Project
Ensuring the safe operation of your transformers starts with accurate, repeatable BDV diagnostics. If you are looking for an automated, field-ready testing solution, explore the complete range of ZWJD Series Insulating Oil BDV Testers from HB ZHIWEI.
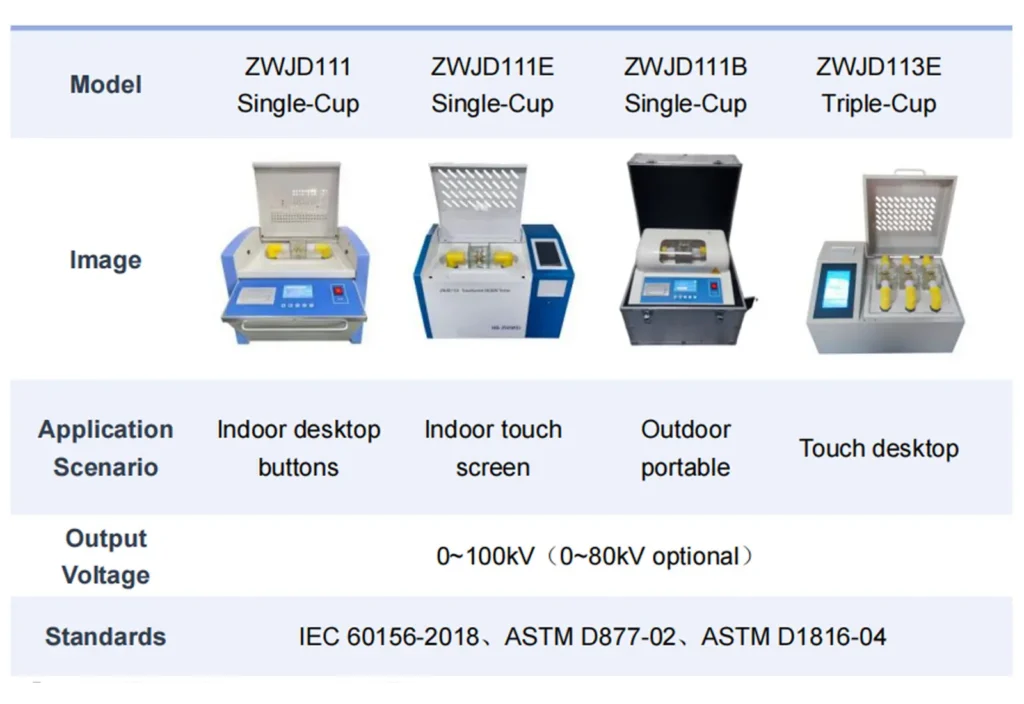
For Field Testing & Portable Maintenance: Explore the ZWJD111 / ZWJD111E / ZWJD111B (80kV / 100kV) single-cup automated units with integrated thermal printing and rugged carrying cases.
For High-Throughput Laboratories: Check out the ZWJD113E (80kV / 100kV) three-cup testing systems, engineered for continuous batch analysis without cross-contamination.
All HB ZHIWEI oil breakdown test sets are fully compliant with IEC 60156, ASTM D877, and ASTM D1816 standards, featuring high-voltage interlocks and automatic stirring routines.
Ready to upgrade your oil testing lab?
Visit zwpowertest.com to view complete technical datasheets, download operation manuals, or contact our engineering support team today for a customized proposal and competitive quotation.